Maintaining your bike’s chain
The drivetrain on most bikes consists of a chain and sprockets. Exposed to the elements, they require regular checks and maintenance.
A correctly-adjusted and well-lubricated chain drive is very efficient at transferring power. The problem is that it’s exposed to the elements, while dirt and dust sticks readily to the grease.
Keeping the chain clean, lubricated and adjusted pays dividends in longevity, smooth power delivery, performance and economy.
Cleaning the chain
Clean the chain and rear sprocket every 1,000 to 1,500km using a chain cleaning spray and a stiff nylon brush. A purpose-design three-sided chain cleaning brush is best. Once clean, wipe away any residue with a clean cloth. Allow the chain to dry off before applying chain lube.
Never try to clean the chain when the engine is running. Always rotate the rear wheel by hand if on a centre stand or paddock stand, or roll the bike along.
The front sprocket is usually hidden away and tends to build up a coating of dirty grease in its housing. Undo the cover and clean it every other time you clean the chain.
Lubing the chain
Give the chain a squirt of lube every 300km, and fully lubricate it after cleaning at the 1,000 to 1,500km mark.
It’s best to lube the chain after a ride, not before, because the lube will better penetrate the hot links.
Spray lube on the inside run of the chain, not the outside where it will just fling off. Aim to get lube between the inner and outer plates and in between the rollers and side plates.
Tension
Check the chain adjustment at every clean. Your bike’s handbook will detail the correct amount of slack, as well as how and where to measure it.
As a general guide, this is what to do:
- Put the bike on its side stand or a paddock stand, so the rear suspension is part compressed.
- Make sure the gears are in neutral.
- Find the approximate mid-point of the chain’s bottom run between the front and rear sprockets.
- Hold a ruler or tape measure in place against the underside of the swingarm at that mid-point, push the chain up as far as it will go, then down as far as it will go.
- Measure the total distance between the two using the same spot on the chain as your reference point.
- In general, a road bike should be between 25mm and 40mm. Anything with long travel suspension, like a supermotard, will more like 40-60mm.
Adjustment
As chains wear the slack will increase. If your measurement show the opposite, it may be that the chain has developed a tight spot and will need to be replaced.
How to adjust out the slack:
- You’ll need to have the bike up on a centre stand or paddock stand so the rear wheel is free to move backwards.
- Undo the rear axle clamp nut so the axle will be free to move.
- Slacken the chain adjuster clamp nuts while ensuring the adjusting bolts do not turn.
- Turn the adjusting bolts clockwise on each side by one ‘flat’ of the bolt head.
- Tighten the clamp nuts on the adjusters, again making sure the bolts themselves do not move.
- Do up the axle nut.
- Remeasure the chain slack as before.
Turning the adjusters by one ‘flat’ or sixth may be all you need but, if not, you will now have a gauge of how much difference it will make to the chain tension. Try not to overtighten, because it can be tricky to go back.
It’s important that you measure the slack exactly the same way after adjustment as before, with the bike on its wheels and the axle nut done up to the correct torque.
Axles often have castle nuts with a split or cotter pin. Always replace with a new pin once you’re happy with the adjustment.
Checking wear
The chain and sprockets should be inspected for wear every 10,000-12,000km. How you ride can have a big effect on the chain. The harder you accelerate, the more you stretch it.
Checking the sprockets for wear is done visually. The rear sprocket is usually first to go, but sometimes not by much. The easiest tell-tale is on the tips of the sprocket teeth. There should be a discernible flat on them. If any are worn to a point, the sprocket is well past it and needs replacing. Other signs are teeth worn into hook shapes or rounded off.
If the rear sprocket does need replacing take off the front sprocket cover and inspect it too. It’s often worth replacing both anyway. It’s likely the chain will have worn out too.
To check chain wear:
- Begin with a visual inspection.
- If there’s visible rust on the rollers it’s replacement time. A little on the side plates from neglect might be rescued with a good clean and lube.
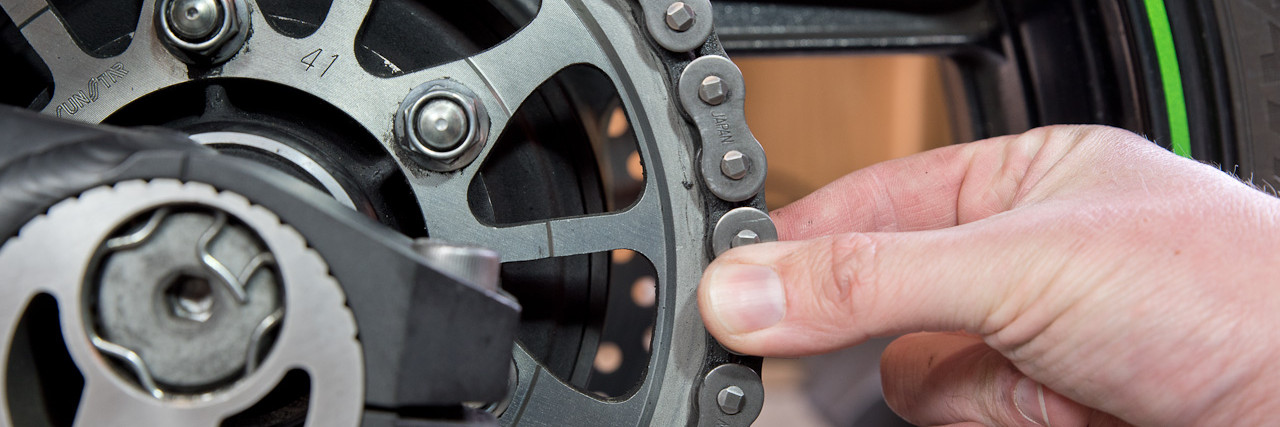
- At the back of the rear sprocket, try to pull a link away from it, parallel to the ground. A new chain will hardly move. If you can see half a tooth or more, the chain is worn out.
If it passes those tests, the process is then the same as checking chain tension, only you have to do it over the whole length of the chain. This requires rotating the rear wheel, so a paddock stand is the best option. You can use a centre stand but the actual slack measurement might not be wholly accurate. However, what we’re looking for here is consistency between the measurements, so it will still work
Measure the slack every 20 cm or so until you’ve made a complete rotation of the chain. Mark where you started with a blob of white-out or grease on the side plate. If the slack measurements vary by more than 10mm the chain needs replacing. Make sure the sprockets are good before doing so.